Save & Segment Email Addresses

Newsletter
Automation
In the Automation module, everything revolves around your users. Here, all email addresses are stored, categorized and segmented. Furthermore, fields can be created that make it possible to send personalized newsletters.
E-Mail Lists
To send personalized and successful email campaigns, it is essential to keep email lists clean. With JUNE you can categorize your recipients e.g. by customer type. Furthermore, it is possible to create additional segmentations within an email list, e.g. by gender, locations or content preferences.
How to
Create Email Lists
- Open the Automation module on the left sidebar.
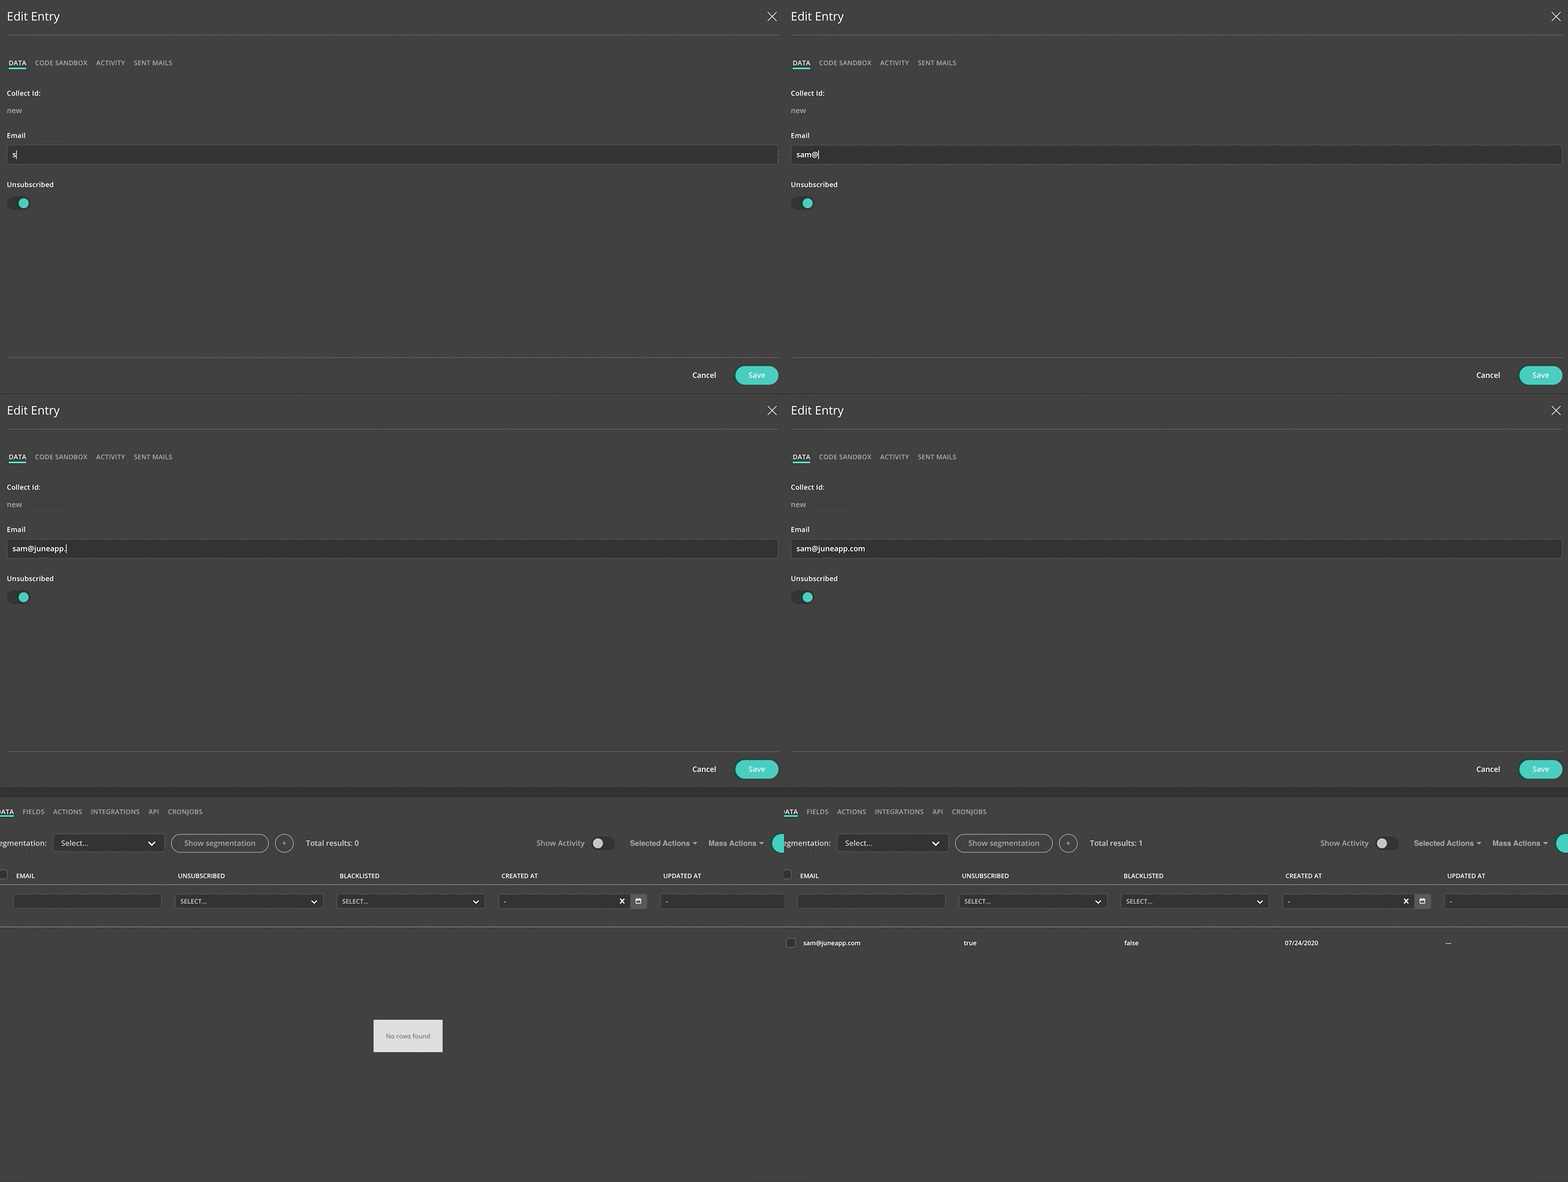
- Click on 'Create' in the upper right corner. A pop-up will appear.
- Select 'Email List' as Type and name your list.
- Click on 'Create' again, so that a new menu opens up. Now enter an email address and save it.
- Of course, you can import existing email lists into JUNE too. Select 'Mass Actions' instead of 'Create'. Select 'Import'. Now you are able to upload CSV files.
Fields
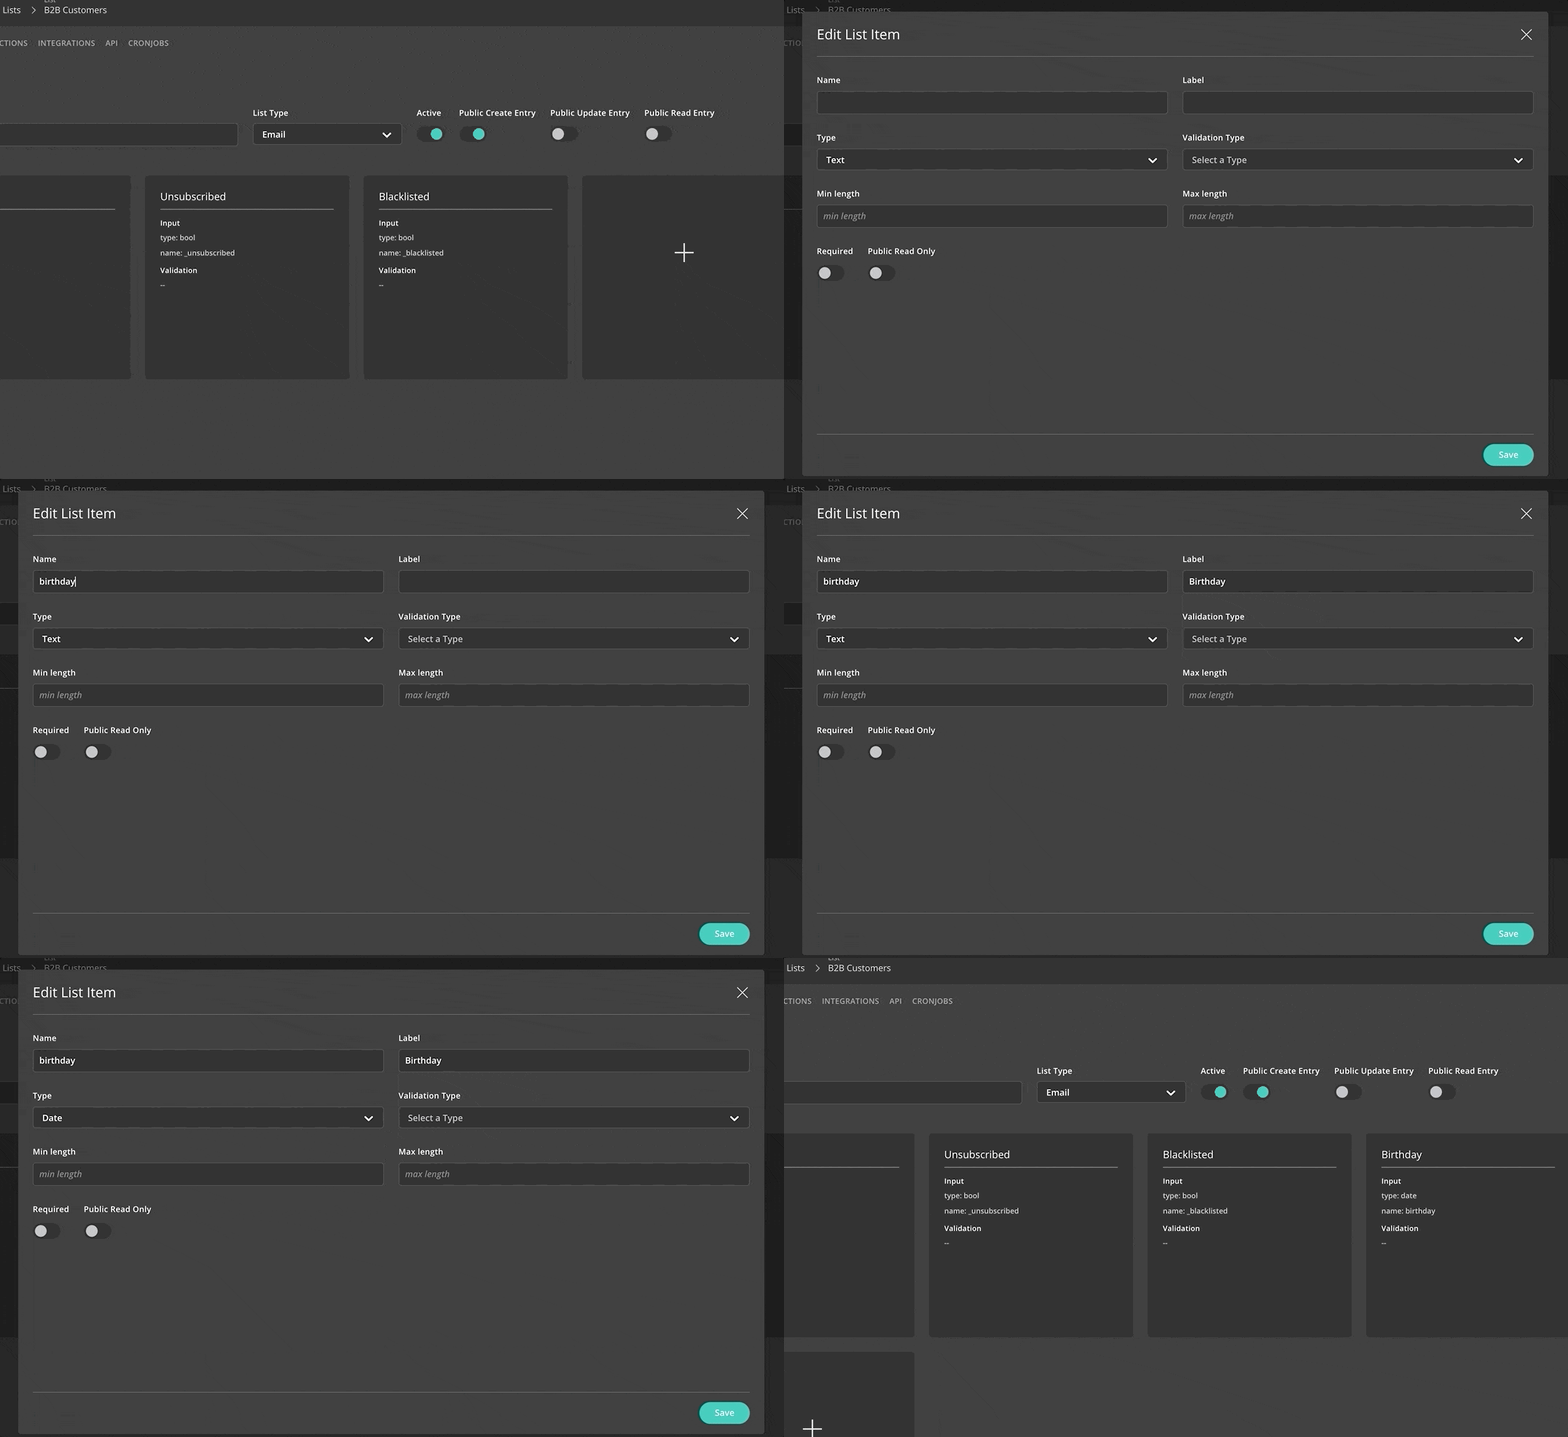
With the creation of Fields, the information that a customer enters in a form is automatically saved in JUNE. A field could be a name, a job title or a phone number. Furthermore, you can use Fields to send personalized emails that greet your users by name. You can even find out the birthdays of your users to send personalized birthday promotions.
How to
Create Fields
How to
Send Personalized Emails
- The previous steps 'Create email lists' and 'Create fields' are required to send personalized newsletters.
- Now open the Campaigns' module on the left sidebar. Create a new campaign.
- Specify the email list that contains your desired fields.
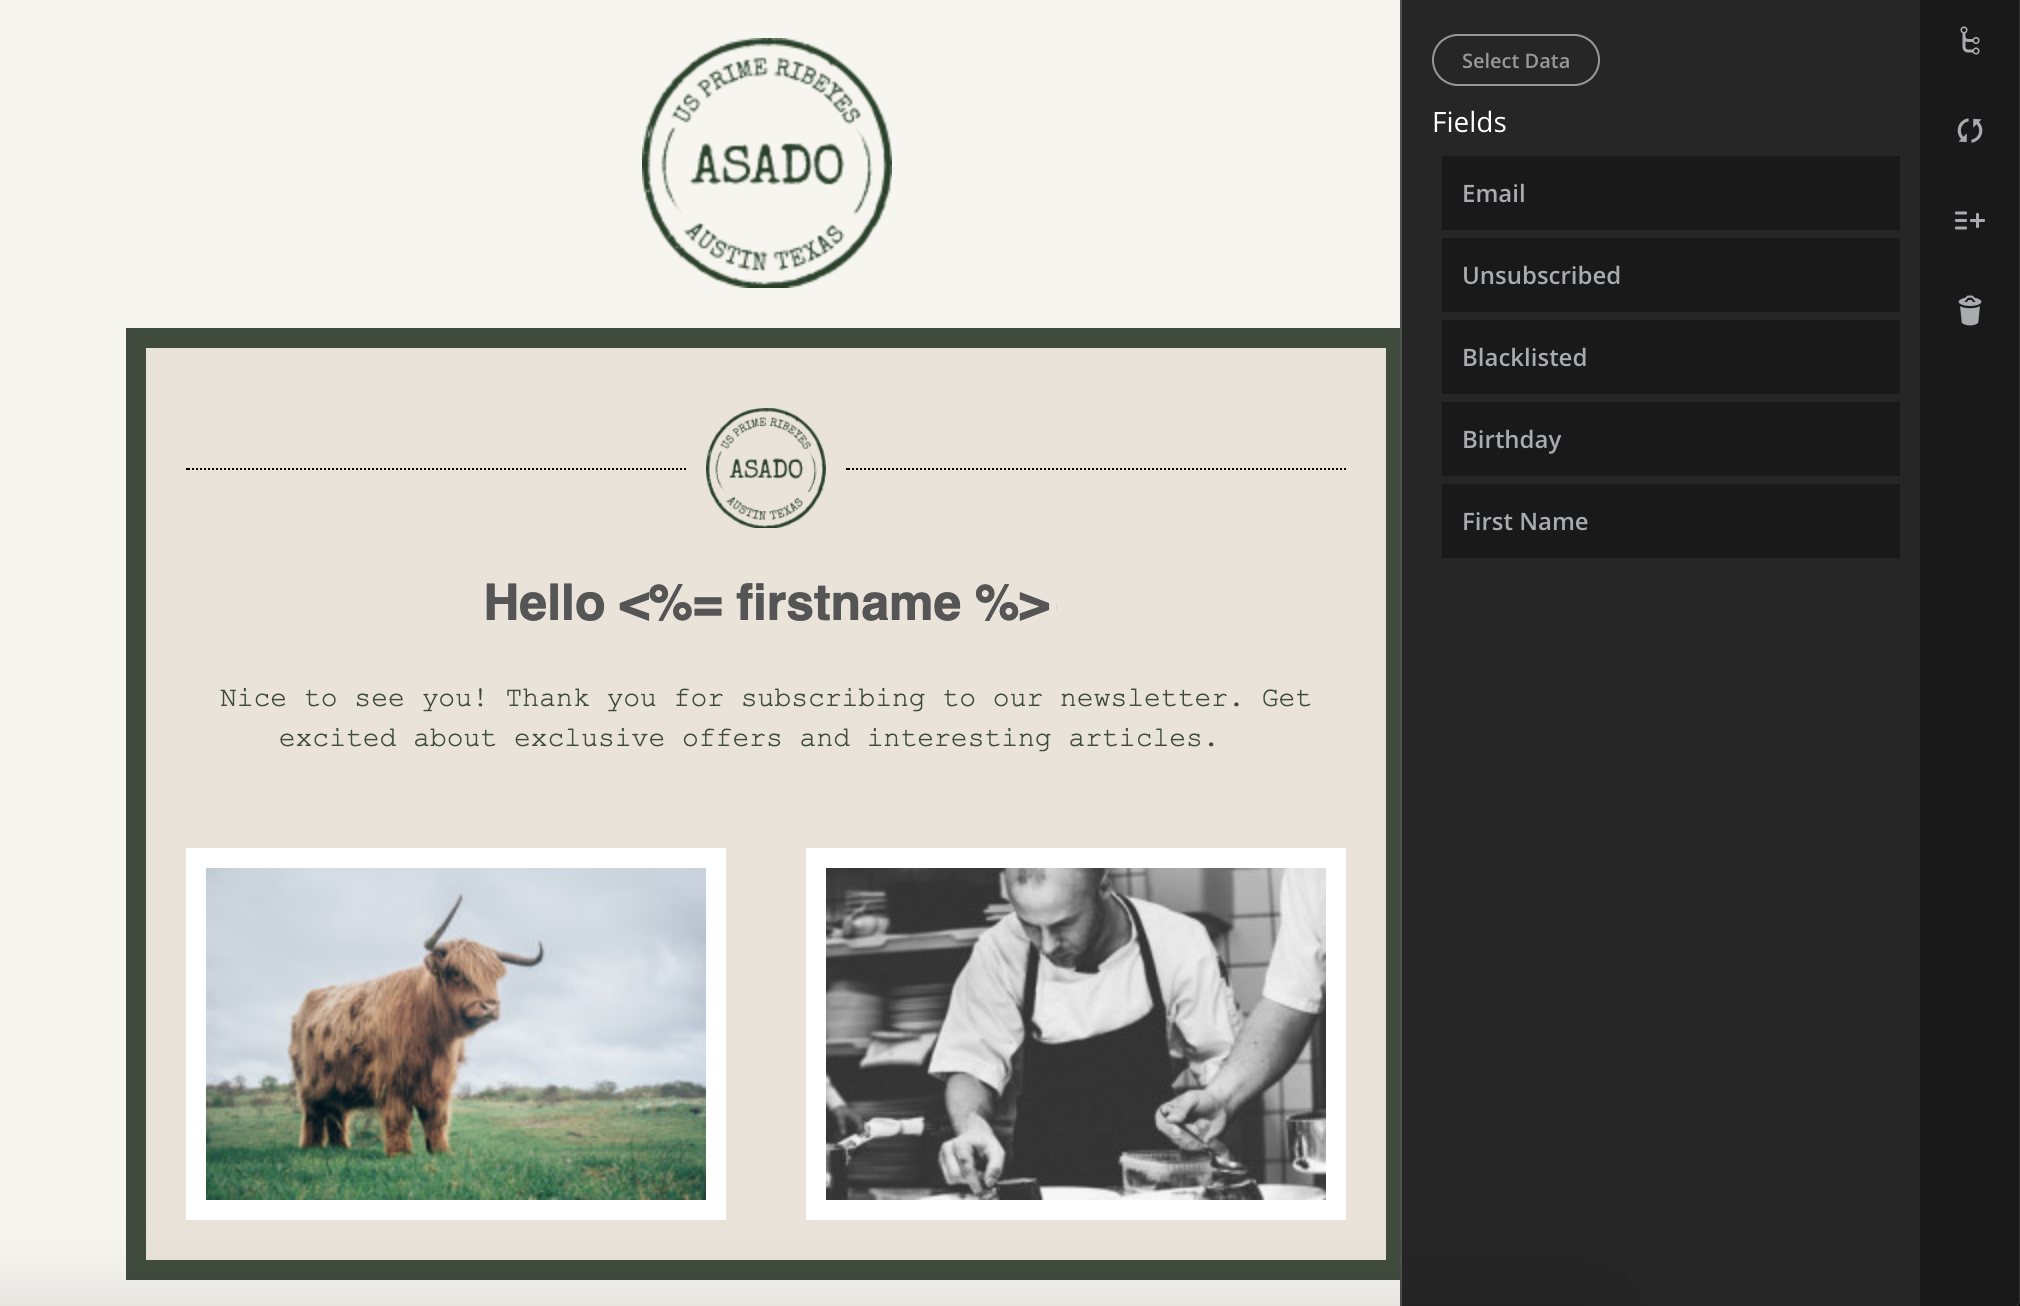
- Add your email template under 'Content'. After that, click 'Edit' to open the email editor.
- Select the Automation icon on the right side. Now you can place your desired field such as 'First Name' into the text component.


